
Service testing is not always easy, but it helps bring a lot of quality to the project. One of the big problems that a good part of quality analysts may face is integrating external services with Postman.
In this article, I will demonstrate how we can integrate the NOSQL DynamoDB database with Postman. But first of all, do you know what DynamoDB is?
DynamoDB
NoSQL databases are, basically, databases that are not relational (SQL). The name NoSQL already shows a bit of that: “Not Only SQL.” These databases do not necessarily need to be similar to each other, but rather are classified this way precisely because they are different from relational models. The term “NoSQL” was created in 1998, but it only really took off in 2006, when it was mentioned by Google.
DynamoDB is Amazon’s exclusive non-relational database, being one of the best, if not the best non-relational database, and of course with thousands of tutorials on how to integrate it with Amazon’s own serverless services. But since that is not the focus of this article, shall we integrate Postman with DynamoDB?
Integrating Postman with DynamoDB!
While Postman covers an incredible service testing demand for all the most diverse Rest API’s ever created, why not integrate it with DynamoDB? Besides making automated tests easier, access control to the database can be implemented better, since only an access key is needed.
So, to get started you will need access to the Amazon console to generate your access key, to DynamoDB, and no less important, to Postman.
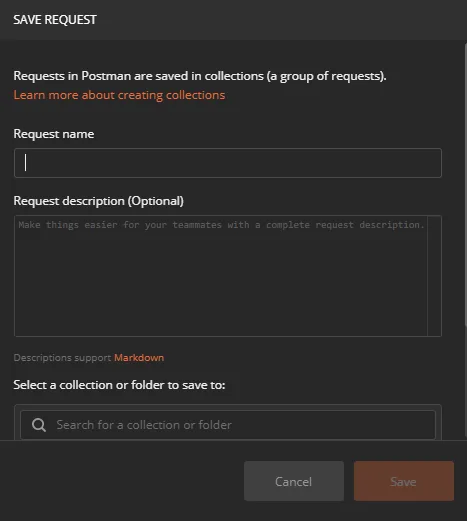
In Postman, select create new request, fill in the data however you want.
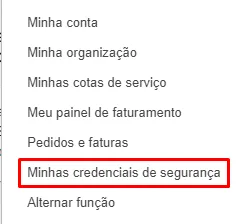
Once that is done, you will need to generate a security key in the AWS console. You can get this key by clicking on your user and then on My Security Credentials.
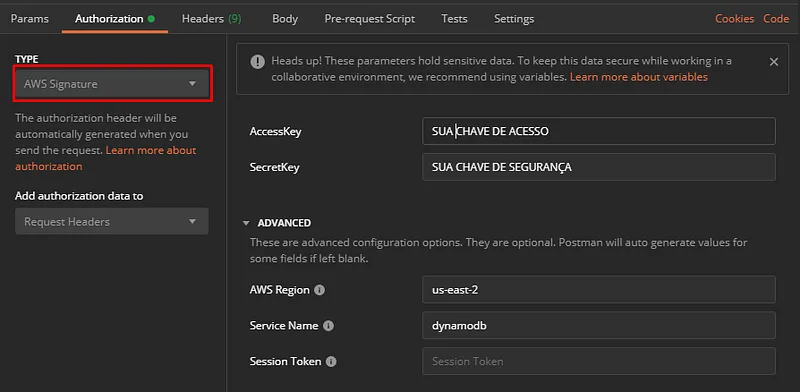
By accessing this page, you can generate an Access Key right below. You will need to save your user’s Access Key and Secret Key. After saving these two values, we will use them in Postman’s authorization tab. You will replace the values as shown below, remembering that the Region you put in must be the one you are currently using. As for the service name, it is the service you intend to query; since we are going to use DynamoDB, it stays as dynamodb.
In your request URL, you must put the service you intend to query, plus the domain and the action you intend to perform. In our case, it will look like this. Remembering that the domain is where you are using Amazon’s services. We will do a Scan on the table. Also remembering that the request must be a Post.

In the header of our request we must pass X-Amz-Target, which in our case is the API version we will use with the function we are going to pass. It is also important to pass the Content-Type, so the API does not run into problems formatting the response; the Postman will fill in the other information manually for you. In your request, it should look similar to the image below:

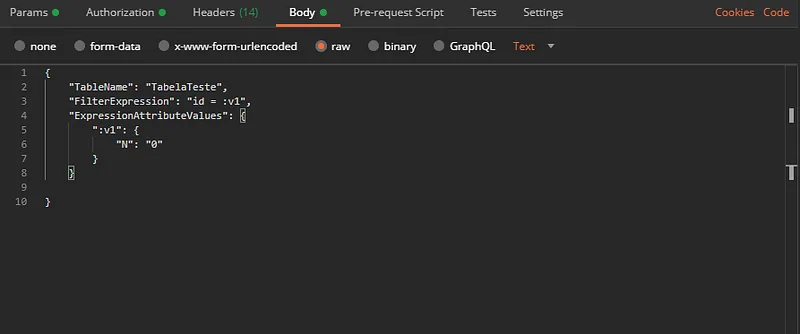
After doing all that, all that is left is to pass the request body. In our case, since we are using a Scan, we will have to pass the table name and what we are going to search for. And we have to use a filter, since it is a SCAN and we cannot get the value through the Partition Key or Sort Key of Dynamo.
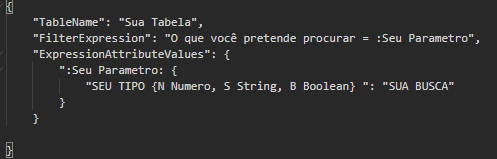
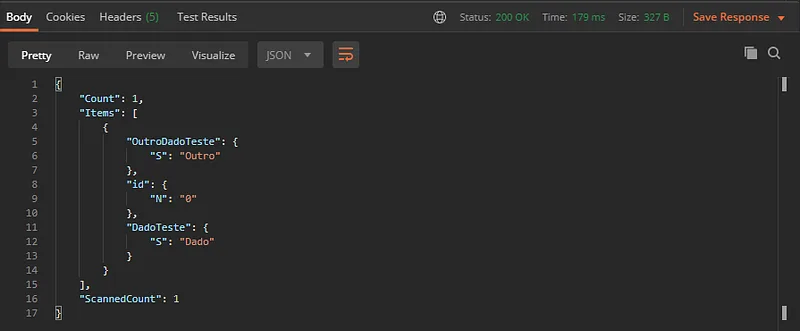
Now just perform the search, and you will have the results in your response body in Postman!
If you want to know which commands you can send to perform searches in DynamoDB, just look in Amazon’s documentation, or access this link that takes you directly there.
Special thanks to Vinicius Martins for helping with the Dynamo/Postman configuration and to Wesley Salmi for his infinite knowledge.
References
NoSQL databases — A practical and didactic manual
Amazon Dynamo DB
Postman/DynamoDB Documentation